A sliding door can be a great addition to your space, offering both style and functionality. But getting it to slide smoothly and fit securely takes more than just attaching it to a track. From measuring the frame to making final adjustments, every step matters.
In this guide, we’ll take you through each step of sliding door installation in Providence, from preparation to final adjustments.
Gather Your Tools and Materials
Before starting, having the right tools ensures a smooth installation process. You’ll need a sliding door kit (including the track and hardware), a screwdriver, a drill, a measuring tape, a level, shims, and safety gear like gloves and goggles.
Make sure to check that all components in your door kit are intact. Missing parts can delay installation and cause improper door function. Double-check the measurements of your door against the frame to ensure compatibility.
Measure and Prepare the Opening
Accurate measurements are key to a well-fitted sliding door. Start by measuring the width and height of the door frame at multiple points to detect any irregularities. Mark these dimensions carefully to avoid mistakes during installation.
If the opening is uneven, use shims to adjust the frame. Also, inspect the surrounding area for any obstructions, such as protruding trim or uneven flooring, which might affect the door’s movement. Proper preparation prevents installation errors later.
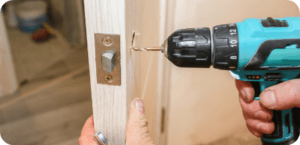
Install the Sliding Track
The track guides the door’s movement, so it must be installed precisely. Begin by marking the placement above the door opening, ensuring it is level. A crooked track can lead to sticking or uneven gliding.
Once marked, drill pilot holes and secure the track using screws. Check its alignment with a level before tightening fully. A well-secured track ensures smooth and effortless door operation.
Attach the Rollers and Hang the Door
Rollers allow the door to slide smoothly along the track. Attach them to the top of the door according to the manufacturer’s instructions, ensuring they are firmly in place.
Next, carefully lift the door and position the rollers onto the track. Slide it back and forth to check for resistance. If the movement isn’t smooth, double-check the roller alignment and track positioning. Properly mounted rollers ensure longevity and ease of use.
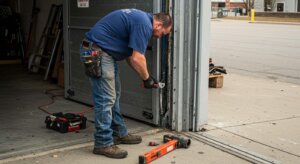
Secure the Door and Make Adjustments
Once the door is hanging, make necessary adjustments for stability. If the door isn’t level, loosen the roller screws slightly and reposition them before tightening. If gaps exist along the edges, insert shims to stabilize the frame.
Also, test the closing mechanism to ensure it fully seals when shut. Poorly adjusted doors may leave gaps, causing drafts or security concerns. Taking time to adjust these elements improves the door’s performance and durability.
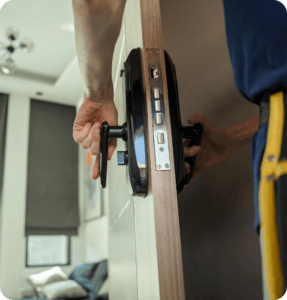
Install the Handles and Final Touches
With the door in place, the last step is installing handles and locks. Follow the manufacturer’s guide to position the handles at a comfortable height. Secure them tightly to prevent loosening over time.
Finally, clean the track to remove dust or debris that could interfere with movement. A well-maintained track and properly installed handles complete the sliding door installation, ensuring ease of use and a polished look.
Read More: The Best Ways to Fix a Scratched or Scuffed Door Surface
Need Help With Door Installation in Providence?
Installing a sliding door can enhance your home’s functionality and style, but achieving a perfect fit requires precision. Providence Door Company specializes in door installation in Providence, ensuring smooth operation and long-lasting durability. Our experts handle everything from alignment to final adjustments, so you get a flawless installation without the hassle.
Enjoy a seamless sliding door experience—contact us today to schedule your installation!